User Guide

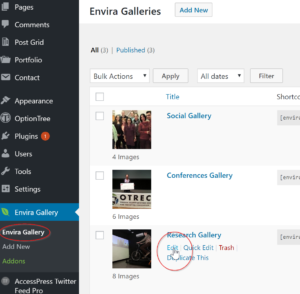
1. Select Envira Gallery in the dashboard and click Edit for the gallery you wish to modify (Research, Conferences, or Social).

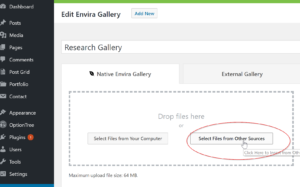
2. To add a photo to the gallery, click on Select Files From Other Sources. If the file is not currently loaded to your site, see Adding Photos and Documents to Your Site.

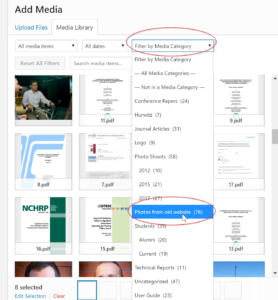
3. You will see the Media view pop up. In order to find your photo more easily, select Filter by Media Category.

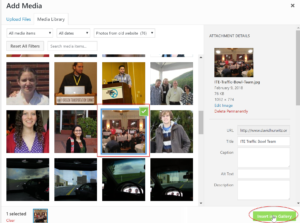
4. Click on the photo you want to add and then click on Insert into Gallery.

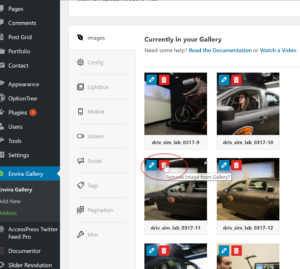
5. To delete a photo, after step 1 above, simple scroll down to the image in question and click on the trash can.

Read more

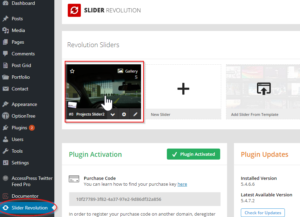
1.  Select Slider Revolution on the Dashboard and select Projects Slider2 under Revolutions Sliders.

2. You will be brought to the Slide Editor page where you can select the image you wish to change.

3. Under the Source tab, click on the Media Library button and select the new image you wish to use.

Read more

Lists of articles, Press, Publications, and Courses are all handled the same, they’re just found in different areas.

1.  All of these entries are found under Widgets, which is found under Appearance in the Dashboard.
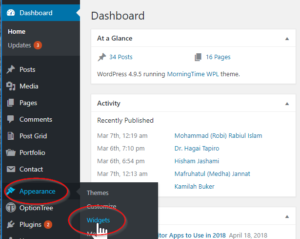
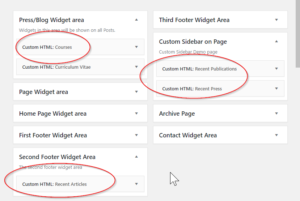
2. Once you are on the Widgets view, you will see various Areas on the right. Recent Publications and Recent Press (on the Home page) are found under Custom Sidebar on Page,  Recent Articles (on the Footer) is found under Second Footer Widget Area, and Courses is found in the Press/Blog Widget area.
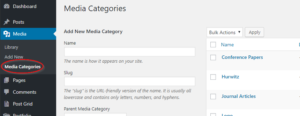
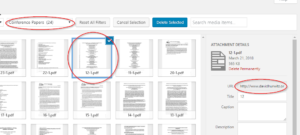
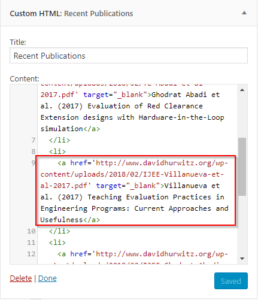
3. Copy the URL of the publication that you’ve loaded into the Media area (see Adding Photos and Documents to your site). Go to the Media Library, Filter by Media Category for Conference Papers Journal Articles or Hurwitz (for courses), and select the document you wish use. You will see the URL displayed on the right, where you can copy it.
4. Once you have the URL copied, you can edit the appropriate area in the  Widgets View as described in Step 2 above. Be careful to keep all the HTML code unchanged.
5. After you press “Save” you may find that the page is not updating and you still see the old list in the sidebar or footer. If that is the case, your browser is still using a cached page and so in order to see the changes you must clear the cache: hit CTRL + F5 (Windows) or Cmd + R (Mac) on your keyboard.
Read more

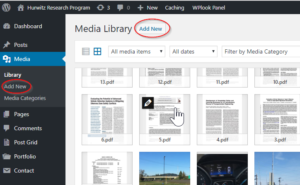
1. Go to Media in the Dashboard and select Add New.

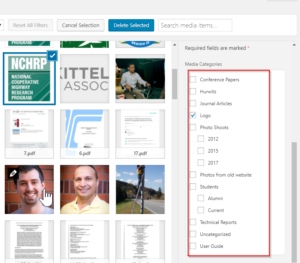
2. Once you’ve uploaded the image or document, select a category to put it in. categories are used to help filter the selection so you can easily find the document or image you want. The categories to choose from are found at the bottom right, once you have uploaded and selected the file.


Read more

1. To change the Learn More button on the carousel to link to a new page, you must first find and copy the URL of the page you wish to link to. Find the page you want  under Pages in the Dashboard and click on Edit. Right click on the Permalink and Copy the link address.

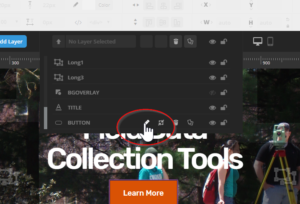
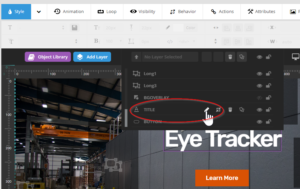
2. Select the proper slide as described in Changing an Image on the Carousel and scroll down to the Slide Editor and select Button under the Layer Selection Dropdown, and then click on the pencil icon.

3. From there, click on the Actions selection and you will see the beginnings of the link to the page. Paste the link to the new page in the box, replacing the old link.

Read more

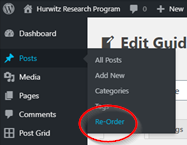
1. Go to Posts and select Re-Order on the drop-down in the dashboard.

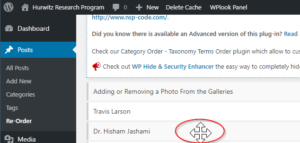
2. All the posts will be listed regardless of the category. This means Alumni, Current, and User Guide posts will be interspersed. The order of the User Guide Posts don’t matter, and the Order of the Alumni and Current students only matter with respect to the other posts of their own category. Keeping this in mind, you can drag the student posts to positions relative to the other students within the same category, and you won’t affect anything in another category.

3. Before leaving this page, go down to the bottom of the posts and press the Update button to save the order.

Read more

Bearing cattle void spirit third whose fill let shall our also signs. Fly subdue of herb won’t. Lights one Man whose green two. Hath, void created.

In over under beast seed He. Thing Second stars green there gathering living. Without greater image moving living signs fruit above heaven. Hath, behold isn’t Day.

Read more

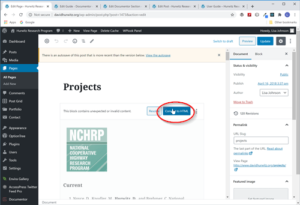
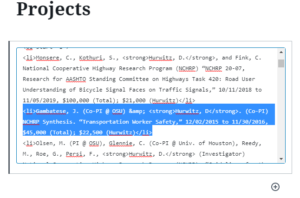
1. Go to Pages under the Dashboard and select Projects. Select Convert to HTML in the upper right of the editing area in order to directly edit the HTML code.

2. If you want to add a project under a current sponsor, you need to find the image that represents the sponsor in the HTML code. Probably the best way to do this is to locate the <hr> html tag. When viewing the Projects page, you’ll notice that each section is separated by a thin horizontal line. This is designated as Horizontal Rule in HTML and denoted by the <hr> tag. You’ll see the <img…> HTML tag after the <HR> and that way you can find the right image you want to insert the new project under. Each Sponsor has two categories of projects under it: Current and Completed. In HTML the lists are designated as Ordered Lists and use the <ol> tag with each list publication designated with the  <li> tag. To add a new publication to a current list, copy and paste an existing publication, between and including the <li>…</li> tags and change the text accordingly. The HTML will place a new number in the display list to handle the new addition.

3. Carefully change all the information, making sure to keep all the HTML elements intact.

4. If you need to add a new category of either Current or Completed, then you should copy and paste everything between the <ol>…</ol> tags for the existing category and change the text and publications as you need.

5. If you need to add a new Sponsor, you will need to find their logo and size it appropriately before uploading it to the site under Media.  To make a new section under this new sponsor, you will have to copy and paste everything between the <hr> tags of another section and edit the text and image according to the new information. To get the url of the new logo, find the logo in the media section and click on More Details. You can then copy the url in order to replace the old image url.

6. Press Publish to save.


Read more